A Complete Guide to Making DIY Candles
Creating your own candles can be a fulfilling and enjoyable craft that allows you to personalize your home with unique, hand-crafted scents and designs. DIY candles are not only a great way to express creativity but also make for thoughtful and personalized gifts. Whether you're a seasoned crafter or a complete beginner, making candles at home can be a straightforward and rewarding experience. In this comprehensive guide, we'll walk you through everything you need to know about making DIY candles, including materials, the step-by-step process, and essential tips to ensure your candles turn out beautifully.

What You'll Need
To get started with candle making, you'll need a few essential supplies:
- Wax: There are several types of wax available, including paraffin, soy, beeswax, and palm. Soy wax is popular for beginners due to its ease of use and clean-burning properties. Beeswax is a natural option with a subtle honey scent.
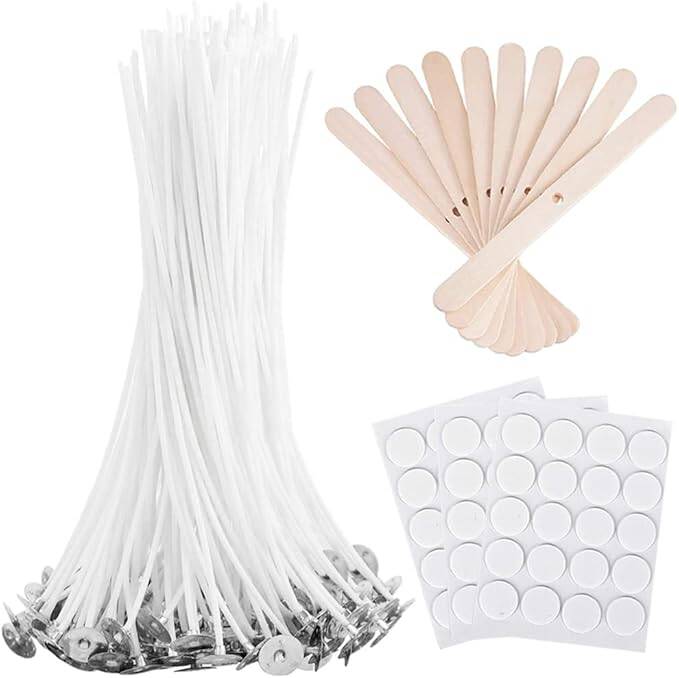
- Wicks: The wick is crucial for the candle's burn quality. Cotton wicks are commonly used, but there are also wooden wicks and metal-core wicks. The size of the wick should match the diameter of your candle to ensure an even burn.
- Fragrance Oils: To add a pleasant scent to your candles, use fragrance oils designed specifically for candle making. Essential oils can also be used for a natural aroma, but they might not be as strong as fragrance oils.
- Dye: If you want to add color to your candles, candle dyes or crayons can be used. Ensure that any dye you use is suitable for candle wax.
- Molds or Containers: You can use various molds or containers to shape your candles, including glass jars, silicone molds, or metal tins. The choice depends on the desired shape and style of your candle.
- Double Boiler or Heat Source: A double boiler is ideal for melting wax evenly, but you can also use a heat-safe container over a pot of simmering water.
- Thermometer: A thermometer helps you monitor the temperature of the wax to avoid overheating or underheating.
- Stirring Utensil: A heat-resistant spoon or spatula is useful for stirring the wax and blending in fragrance oils or dyes.
- Wick Holders: These are small tools or devices that keep the wick centered while the wax sets.
How to Make DIY Candles
Step 1: Prepare Your Workspace Before you start, set up a clean, well-ventilated workspace. Cover surfaces with newspaper or disposable tablecloths to catch any drips or spills. Gather all your supplies and tools so that they are easily accessible.
Step 2: Melt the Wax Cut the wax into small chunks for even melting. Place the wax into the double boiler or heat-safe container. Heat the wax gently until it reaches around 180-185°F (82-85°C), stirring occasionally to ensure it melts evenly. Avoid overheating, as this can cause the wax to burn or degrade.

Step 3: Add Fragrance and Dye Once the wax is melted, remove it from the heat. If you are using dye, add it now and stir until you achieve the desired color. Next, add the fragrance oil. Generally, use about 1 ounce of fragrance oil per pound of wax. Stir thoroughly to ensure that the fragrance is evenly distributed throughout the wax.
Step 4: Prepare the Wick While the wax is cooling slightly, attach the wick to the bottom of your mold or container using a wick sticker or a small amount of melted wax. Make sure the wick is centered and upright. If you are using a wick holder, place it in the container to keep the wick in place.
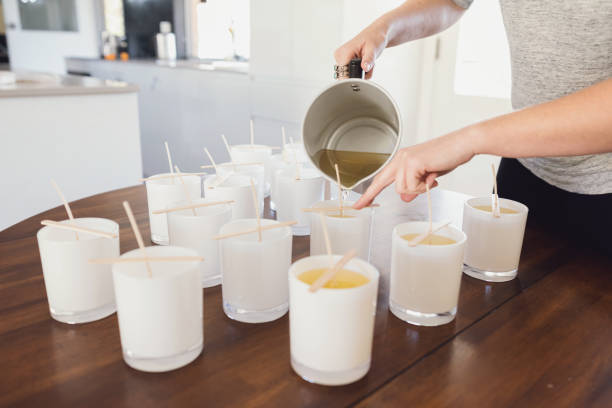
Step 5: Pour the Wax Allow the wax to cool to around 130-140°F (54-60°C) before pouring it into the mold or container. Pour the wax slowly to minimize bubbles and avoid splashing. Leave a small amount of wax in the pot to top off any sinkholes that may form as the candle sets.

Step 6: Secure the Wick Use a wick holder or a pencil placed across the top of the container to keep the wick centered and straight while the wax sets. Allow the candle to cool completely at room temperature, which may take several hours.
Step 7: Trim the Wick Once the candle has hardened and cooled, trim the wick to about 1/4 inch (0.6 cm) above the surface of the wax. This length ensures a clean, even burn and prevents excessive soot.
Creative Candle Ideas
Take your candle-making to the next level with these fun and imaginative ideas:
- Embedded Objects: Add a personal touch by embedding items like dried flowers, herbs, or small decorative elements into your candles. Simply place the items in the mold or container and pour the wax over them. Ensure they’re evenly distributed and won’t interfere with the wick.

- Layered Colors: Create candles with multiple layers of different colors. Pour one layer at a time, allowing each to cool slightly before adding the next. This technique results in striking, multi-colored candles with a beautiful gradient effect.
- Marbled Effect: Achieve a marbled appearance by swirling different colored waxes together. Pour different colors into the mold, then gently swirl them with a stick or spoon before they set.
- Flower-Infused Candles: Incorporate fresh or dried flowers into your candles for a lovely, natural touch. Arrange the flowers in the container or mold and pour the wax over them, ensuring the flowers are evenly dispersed.

- Holiday Themes: Design candles with holiday-specific shapes and colors. For example, create pumpkin-shaped candles for Halloween or snowflake-shaped candles for winter holidays. These make festive decorations and delightful gifts.
- Personalized Shapes: Use silicone molds to make candles in unique shapes like stars, hearts, or even miniature versions of favorite animals. These personalized candles are great for special occasions or as custom gifts.

- Scent Layering: Combine different scents in one candle by creating layers with varying fragrances. Start with a base scent and add additional layers with contrasting or complementary scents for a complex and evolving aroma.
- Geometric Designs: Mold candles into modern geometric shapes such as pyramids, spheres, or cubes. These sleek designs add a contemporary touch to your decor and make great conversation pieces.
- Miniature Candles: Craft small, bite-sized candles in tiny tins or jars. These are perfect for party favors, decorative accents, or simply adding a touch of charm to small spaces.
Tips for Success
-
Temperature Control: Always monitor the temperature of the wax to avoid overheating. If the wax gets too hot, it can cause the fragrance to dissipate or the wax to become discolored.
-
Wick Size: Choosing the correct wick size is crucial. A wick that is too large can cause a large, smoky flame, while a wick that is too small may not burn the candle evenly.
-
Testing: Before making a large batch, test your candles with small samples to see how they burn and how well they hold the fragrance.
-
Cure Time: Allow your candles to cure for at least 24 hours before burning. This helps the fragrance and wax to bond properly, resulting in a better burn and stronger scent throw.
-
Safety First: Always use heat-resistant containers and avoid pouring hot wax directly onto surfaces that could be damaged.
Making DIY candles is a rewarding craft that combines creativity with functionality. By following these steps and tips, you can create beautiful, personalized candles that enhance your home or make thoughtful gifts. From selecting the right materials to mastering the pouring and setting process, each step is an opportunity to add your personal touch to your candles. Whether you’re experimenting with different scents, colors, or shapes, candle making allows for endless customization and enjoyment. So gather your supplies, get ready to unleash your creativity, and enjoy the process of making your own candles from scratch!


Create Your Own Website With JouwWeb