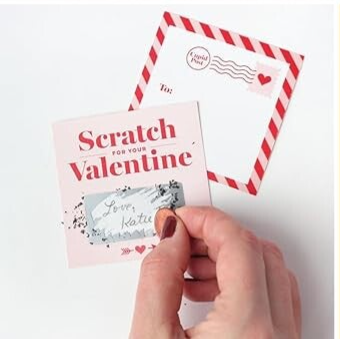
3 Ways to Make Scratch-Off Cards at Home
Looking to add a unique, interactive touch to your next event? Discover 3 Ways to Make Scratch-Off Cards at Home with our comprehensive guide, perfect for anyone who loves to get creative with DIY projects. Whether you're planning a wedding, birthday party, baby shower, or any other special occasion, these homemade scratch-off cards make for the perfect party favor that’s both fun and memorable. Imagine your guests’ excitement as they scratch away to reveal secret messages, hidden prizes, or special surprises tailored just for them. With easy-to-follow instructions and materials you likely already have at home, you can create customized scratch-off cards that will wow your guests and add a personalized flair to your celebration. Whether you're a seasoned crafter or a DIY newbie, our guide will walk you through each step, offering tips and creative ideas to make your cards truly one-of-a-kind. Dive in and start crafting these delightful party favors that are sure to be a hit at any event!

Creating scratch-off cards at home is a fun and creative project, perfect for adding a personalized touch to gifts, invitations, or games. Here are three methods to make your own scratch-off cards:
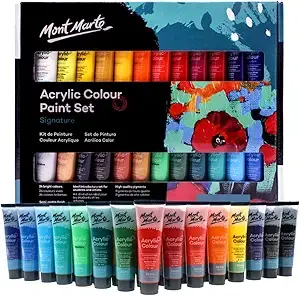
1. DIY Scratch-Off Paint with Acrylic Paint and Dish Soap
This method uses simple materials like acrylic paint and dish soap to create a scratch-off surface.
Materials:
- Cardstock or thick paper
- Clear packing tape or contact paper
- Acrylic paint (any color)
- Dish soap
- Paintbrush
- Pencil or marker

Instructions:
-
Design Your Card: Start by designing your card on cardstock or thick paper. Write the message, prize, or image you want to be hidden under the scratch-off area. Make sure it’s clearly visible.
-
Cover the Hidden Message: Apply a layer of clear packing tape or contact paper over the area where the message is. This step is crucial as it protects the paper from the paint and allows it to be scratched off later.
-
Mix the Paint: In a small container, mix one part dish soap with two parts acrylic paint. Stir until the mixture is well-blended. The dish soap helps make the paint easily removable when scratched.
-
Apply the Paint: Using a paintbrush, apply the paint mixture over the taped area. You may need to apply 2-3 coats to ensure complete coverage. Let each coat dry thoroughly before applying the next.
-
Let It Dry: Allow the paint to dry completely, ensuring it forms a solid, opaque layer.
-
Scratch and Reveal: Once dry, your scratch-off card is ready to use! Recipients can use a coin or fingernail to scratch off the paint and reveal the hidden message.
2. Scratch-Off Stickers with Clear Packing Tape and Metallic Paint Pen
This method is ideal if you want a quicker and mess-free option using metallic paint pens.
Materials:
- Cardstock or thick paper
- Clear packing tape or contact paper
- Metallic paint pen (like silver or gold)
- Scissors
- Pencil or marker

Instructions:
-
Create Your Design: Design your card with the message, image, or prize you want to hide. Write it clearly on your cardstock.
-
Apply Clear Tape: Cover the area with the hidden message using clear packing tape or contact paper. Make sure the tape is smooth and free of bubbles.
-
Create the Scratch-Off Area: With the metallic paint pen, color over the taped area. The metallic paint will create the scratch-off layer. You may need to go over it a couple of times to ensure full coverage.
-
Dry and Test: Let the paint dry completely. Once dry, test a small area to ensure it scratches off easily without damaging the paper underneath.
-
Ready to Use: Your scratch-off card is now ready! The recipient can scratch off the metallic layer to reveal the hidden content underneath.
3. Using Pre-Made Scratch-Off Stickers
If you’re looking for a quick and professional way to create scratch-off cards, using pre-made scratch-off stickers like the 120 Pack Scratch Off Labels Stickers is the perfect solution. These self-adhesive stickers are ideal for DIY projects, allowing you to create customized scratch-off cards with ease and efficiency.
Materials:
- 120 Pack Scratch Off Labels Stickers (2"×1", Silver)
- Cardstock or thick paper
- Pencil, pen, or marker
- Scissors (optional)

Instructions:
-
Design Your Card: Begin by designing your card on a piece of cardstock or thick paper. This is where you’ll decide what message, image, or prize you want to hide under the scratch-off label. Write or draw this in the area where you plan to place the sticker.
-
Apply the Scratch-Off Stickers: Once your design is complete, peel off a scratch-off label from the sheet and carefully place it over the area you want to conceal. The stickers are self-adhesive, so simply press down to ensure it sticks firmly to the card.
-
Trim if Necessary: If the sticker size doesn’t perfectly fit your design, you can trim the cardstock or sticker to achieve the desired look. However, the 2"×1" size is versatile and should cover most small to medium-sized messages or images.
-
Final Touches: Double-check that the sticker is securely in place and that there are no air bubbles. Your scratch-off card is now ready to be used!
-
Scratch and Reveal: Recipients can use a coin or a similar object to scratch off the silver sticker, revealing the hidden message or image underneath.
As you wrap up your DIY adventure, you now have all the tools and tips you need to create unforgettable scratch-off cards at home. Whether you're crafting these cards as a unique party favor, a creative gift, or a fun game for your event, each method allows you to personalize the experience for your guests in a way that’s both entertaining and meaningful. Remember, the possibilities are endless—from revealing secret messages to offering exciting prizes, these scratch-off cards can add that extra touch of surprise and joy to any occasion. So, gather your materials, let your creativity flow, and watch as your scratch-off cards become the highlight of your celebration. Happy crafting!
Looking for more DIY inspiration?
Check out our DIY party activities for even more creative ideas!
Create Your Own Website With JouwWeb